The wet season is nearly here. Last year the Meteorological Service expected Northeast Monsoon conditions to set in around the end of November, and December is when Singapore’s monthly mean relative humidity is highest, at about 87%. For most HDB households that means the same thing every year. The bamboo poles go back in, the airer comes out in the living room, and somebody finds a load of washing that sat in the drum since morning and now smells sour.
It’s a small problem, but it costs you. Musty laundry has to be washed again, which means more water and more electricity. And in a closed service yard in December, a drum that stays wet becomes the kind of place mould likes.
The fix is a phone notification when the washer or dryer finishes. That sounds easy. The way most people try it, with a smart plug that watches the power draw, is the one we’d steer you away from. Here’s what we’d do instead, from free to about S$110.
First, Check Whether Your Washer Already Does This
Before you buy anything, look at the washing machine you already own. Many Samsung and LG models sold in Singapore over the last few years have Wi-Fi built in. Owners often never set it up, because pairing an appliance to an app feels like a chore you do once and forget.
- Samsung: Wi-Fi washers and dryers pair with the SmartThings app, which can send a notification when a cycle ends.
- LG: Wi-Fi models pair with the LG ThinQ app, which does the same.
If yours has the Wi-Fi symbol on the control panel, spend ten minutes pairing it before you spend money. It’s the most accurate option you’ll get, because the machine knows its own programme. It doesn’t have to guess from vibration or wattage.
If you run Home Assistant, these machines get even more useful. The official SmartThings integration exposes a washer’s machine state, job state and completion time as separate entities. The LG ThinQ integration supports LG washers, dryers, WashTowers and WashCombos. You can have the house announce “laundry’s done” on a speaker, or flash a light in the living room. That’s handy if your phone is on silent while you’re working from home.
The catch is that this only works for machines with Wi-Fi. Plenty of HDB flats still have a perfectly good 8 kg top-loader from 2017 with no connectivity at all. For those, you have to work it out from the outside.
Why We Wouldn’t Put a Smart Plug on Your Washing Machine
The standard advice from American smart home forums goes like this. Plug the washer into an energy-monitoring smart plug, and when the power draw drops below a few watts for a few minutes, the cycle is done. It works. In Singapore we still wouldn’t do it, for three reasons.
1. Most smart plugs aren’t rated for it. Look at the fine print on the popular Tapo P110M. TP-Link lists a maximum load of 13A and 2,990W, which looks like plenty for a washer. The same spec sheet also says 1/6 HP motor, and TP-Link advises against appliances with motors bigger than that. One-sixth of a horsepower is about 124W. A washing machine drum motor pulls far more than that during a spin, and many machines also heat the water. A dryer has a drum motor, and a heat-pump dryer adds a compressor. Before you put any plug in front of either one, check whether the plug lists a motor rating. If a plug doesn’t publish a motor rating, ask the seller before you trust it with a washer.
2. You’ve added a switch that can stop your laundry. A smart plug isn’t just a meter. It’s a relay. If someone taps the wrong tile in the app, or an automation that was meant for something else turns it off, the plug cuts power partway through a cycle. That can stop a front-loader mid-wash with water still in the drum. Most people who do this set the plug to “always on” and try never to touch it. At that point you’re paying for a relay you don’t want, just to get the meter.
3. The power reading often doesn’t reach your platform. TP-Link’s own page says the P110M’s energy monitoring is “not supported by Matter yet”. In Apple Home or Google Home you’ll see an on/off switch, but no watts to build an automation from. The data stays in the Tapo app. Home Assistant can read it through its TP-Link integration, but if you’re running Home Assistant anyway, the option below is simpler.
None of this makes smart plugs bad. We still like them for things like a kettle, rice cooker or dehumidifier when you want to know what they cost to run. A washing machine is just the wrong job for one.
The S$28 Fix: Stick a Vibration Sensor on It
A running washer shakes. When it stops shaking for long enough, the cycle is over. A vibration sensor measures exactly that. It doesn’t touch the power at all, so it can’t stop a cycle, and it doesn’t care what motor or heater is inside the machine.
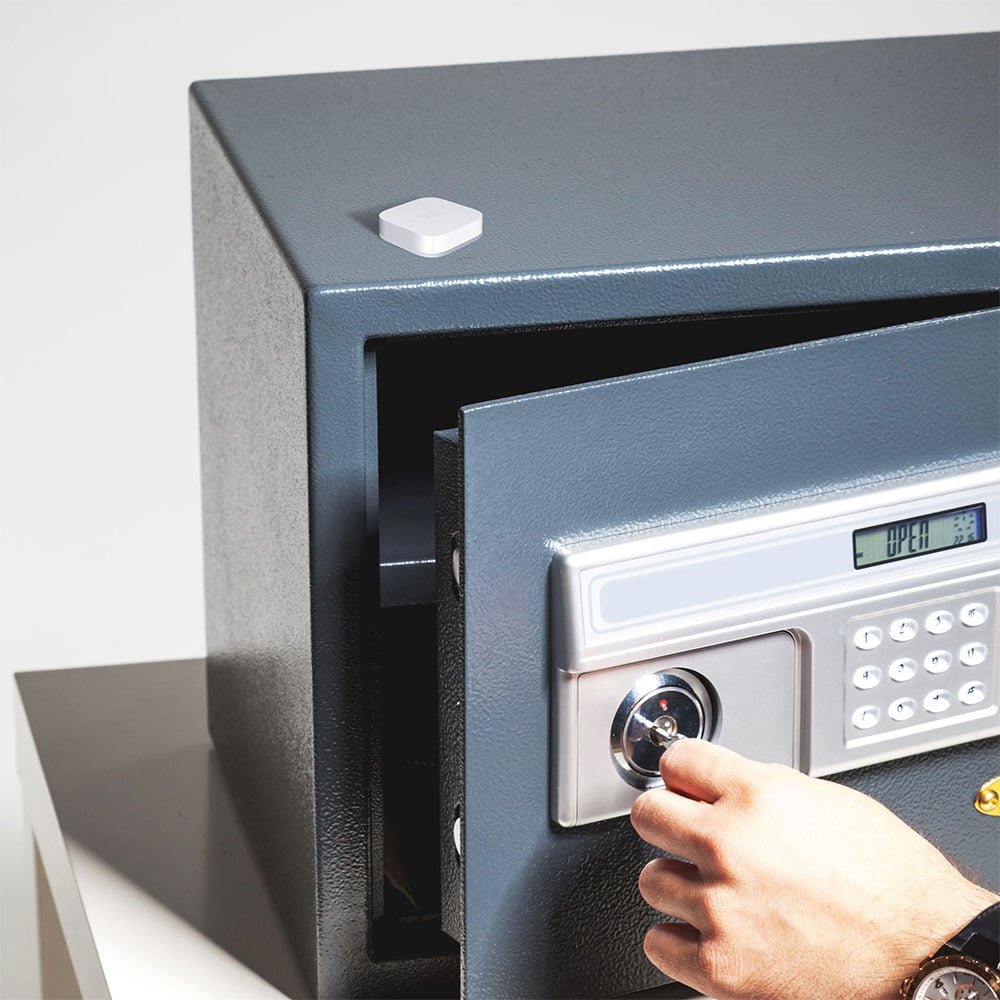
The Aqara Vibration Sensor T1 costs S$28 to S$30 at HomeSmart Singapore, depending on the version. It’s a small battery-powered Zigbee 3.0 sensor that detects vibration, tilt and drops. Aqara pitches it for safes, paintings and even cookie jars, but it works just as well on a washing machine. Aqara’s official product page has the full specifications.
What it needs:
- An Aqara hub. It’s Zigbee, so it won’t pair straight to your phone or to a HomePod. If you don’t own one yet, the Aqara Hub M100 is the cheapest way in. It’s a USB-powered stick that works as a Zigbee hub, a Thread border router and a Matter bridge, and HomeSmart sells it from S$82.
- Or a Zigbee stick in Home Assistant. If you already run Home Assistant with ZHA or Zigbee2MQTT, the T1 pairs to that directly and you don’t need an Aqara hub at all.
Where to Put It
Stick it on the top panel near a back corner, where the cabinet moves most during a spin. On a top-loader, keep it away from the lid so that opening and closing the lid doesn’t set it off. Don’t put it on the door of a front-loader, because loading the machine will trigger it.
Watch out if your washer and dryer are stacked, as they are in a lot of small HDB service yards. A sensor on one machine will pick up the other one running. Put one sensor on each and give them different sensitivity settings. If you only run one machine at a time, accept that you’ll get the odd confused alert.
Start with a low sensitivity setting. One Aqara forum user who built this exact automation settled on low sensitivity with a five-second reporting interval. On high, the sensor can react to someone walking past or the door of the household shelter slamming.
The Honest Limitation: Where the Automation Runs
This is where most people get stuck. The sensor is good at saying “I’m shaking right now”. What you actually want to know is “it was shaking for a while, and now it has been still for five minutes”. That needs timers on both ends.
One builder on Aqara’s own forum put it plainly: Aqara Home and Apple Home “don’t have the nuance required”. The workaround posted there chain Home Assistant, Apple Shortcuts and a third-party notification app together. If you’re in pure Apple Home with no Home Assistant, a vibration sensor is a fiddly project. The Samsung or LG route above, or simply setting a phone timer, is less work.
If you have Home Assistant, though, it’s about fifteen lines.
Building It in Home Assistant
The idea: treat the washer as running once it has been vibrating for three minutes straight, and as finished once it has been still for six. The three-minute start filters out someone bumping the machine. The six-minute end gives the machine time to pause, refill and soak between stages without setting off an early alert.
Add a template binary sensor and one automation. Change the entity names to match yours.
template:
  - binary_sensor:
      - name: "Washer running"
        state: "{{ is_state('binary_sensor.washer_vibration', 'on') }}"
        delay_on: "00:03:00"
        delay_off: "00:06:00"

automation:
  - alias: "Laundry finished"
    triggers:
      - trigger: state
        entity_id: binary_sensor.washer_running
        from: "on"
        to: "off"
    actions:
      - action: notify.mobile_app_your_phone
        data:
          title: "Washer's done"
          message: "Hang it up or move it to the dryer."
Three tweaks we’d make after the first week:
- Got an alert halfway through a cycle? Your machine has a long soak or “eco” phase. Raise
delay_offto 8 or 10 minutes. - Want the reminder to repeat? Add a door contact sensor to the washer lid or door, and keep notifying every 20 minutes until it has been opened. This is the part that saves loads in practice. One alert is easy to swipe away during a Teams call.
- Several people at home? Send it to a speaker, or to everyone’s phone through a notify group, so it isn’t always the same person who hears it.
Aqara hubs can share some devices with Home Assistant through their Matter bridge, but not every sensor type comes across in a useful form. For this job, pairing the sensor directly to Home Assistant’s own Zigbee radio is the dependable route.
Don’t Forget the Dryer (or Your Climate Vouchers)
Monsoon season is when HDB dryers earn their keep, and a dryer that finishes and then sits there is a smaller version of the same problem. Clothes left in a warm drum crease, and in a humid flat they slowly take on moisture again. The vibration-sensor approach works on a dryer too. Use a separate sensor and probably a shorter delay_off, because dryers don’t stop to soak.
If you’ve been meaning to buy a dryer anyway, remember that 5-tick clothes dryers joined the Climate Vouchers list in April. We broke down what the S$400 in Climate Vouchers can and can’t pay for last month. A voucher-eligible dryer with Wi-Fi gets you both the energy rating and a built-in finish alert, so you don’t need the sensor at all.
While You’re in the Service Yard
The service yard is one of the dampest corners of an HDB flat, and you’re already sticking sensors in there. Two more are worth adding.
- A leak sensor under the washer. A split inlet hose or a blocked drain on a front-loader can put a lot of water on the floor quickly. A leak sensor on the floor behind the machine is the cheapest insurance in the flat. Our water leak sensor guide covers the options.
- A humidity sensor where you dry clothes indoors. An Aqara Temperature and Humidity Sensor by the airer tells you when the room is too damp for laundry to dry properly. That’s your cue to switch on a fan or dehumidifier, or close the window before the next downpour. We explained why a Singapore flat needs different humidity thresholds from the ones in imported guides in our bathroom exhaust fan automation piece, and the same thinking applies here.
If you’re heading overseas for the school holidays, the same leak and humidity sensors do double duty. Our December away-mode guide shows how to set them to alert you while you’re away.
What We’d Actually Buy
You have a Wi-Fi Samsung or LG washer: Spend nothing. Pair it to SmartThings or ThinQ and turn on notifications. If you run Home Assistant, add the integration and send the alert to a speaker as well.
You already have an Aqara hub or Home Assistant with Zigbee: Buy the Aqara Vibration Sensor T1 for S$28 to S$30, and set up the template above. This is the best value in this article.
You have neither: The Aqara Hub M100 (from S$82) plus a vibration sensor comes to about S$110. That only makes sense if the hub will also run other things, like leak sensors, a humidity sensor or door sensors. For laundry alone, a phone timer is free and honestly good enough.
What we’d skip: Putting the washer on a smart plug. It’s the most common suggestion and the worst fit. You end up with a relay in front of a motor it often isn’t rated for, plus a power reading your Apple or Google setup can’t use.
The wet season is long, and an airer full of half-dry clothes in the living room is going to happen either way. A sensor that tells you the washer has finished at least gets the next load out of the drum before it starts to smell.